Tuesday, December 11, 2012
Bye and Hello!
Monday, December 10, 2012
Long Time No See!
Sorry lately I've been busy and haven't been here to entertain you all! This weekend I will be putting up LOTS of sewing things so sharpen those needles.
I have one quick beauty tip. This works every time a pimple pops up. This beauty:
I have one quick beauty tip. This works every time a pimple pops up. This beauty:
That's right, toothpaste. Put a dab on your pimple, go to sleep and wa-la! Clean skin! Careful with your pillow though. You might want to put down a towel down
XX
Harley Rae
Tuesday, November 27, 2012
Heart Hand Warmers (That Smell Good!)
I Saw tutorial for these on other site and thought to make them. Perfect for the cold! It's 40 degrees here!
Supplies:
White rice
needles
white string
scissors
lavender (optional)
Monday, November 26, 2012
Sunday, November 25, 2012
Pearl Pins
DIY Pearl Pins
I saw something similar in a store and thought, 'Why not make my own?'
1. Once the glue gun in heated up, put a little dot on the end of the pin.
2. Press the pearl on the glue and hold for 5 seconds
3. Wear and enjoy!
DIY Bubble Bath
I love bubble baths but it can be expensive if you get the mix at a Bath and Body Works. So I hit Google and found this recipe to make my own.
For this You'll Need:
A measuring cup
a mason jar (or other container)
an egg white
a few drops of food coloring
a few drops of an essential oil (found at your local drug store)
1/2 cup liquid hand soap
1 tsp honey
Mix all the ingredients in the measuring cup well, once it has a nice consistency pour into the mason jar and you're done!
Now you'll have a bubble bath that smells great. It makes a great gift too.
Paper Hearts
I recently made these Paper Hearts to tape to my windows
If you like them, they're super easy to make! (Sorry no pictures to follow)
1. Rip out about 5 pages from an old book
2. Fold them in half
3. Draw a half of a heart (I could fit three hearts on the page
4. Cut them out
5. Unfold them and tape them on your windows, walls, or wherever!
Shopping Bag Book Covers Tutorial
Shopping Bag Book Covers: A How To Tutorial
So I did this to all my textbooks and my friends loved them. So I decided to make a tutorial! Follow these steps and look cool (and green) at school.
You'll Need:
a textbook you want to cover
scissors
tape
a shopping bag a little larger than the textbook
(the paper kind works best and lasts longer)
1. Rip out the handles of the bag (if your bag has them)
2. Cut down the right side of your bag
3. Cut out the bottom of the bag (along the creases)
4. Now your bag should look like this
5. Spread your textbook cover
6. Spread the bag over the book
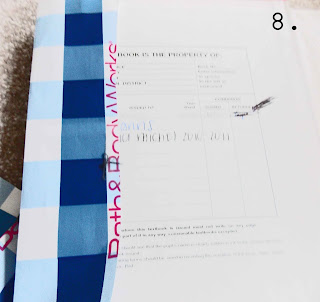
7. (ignore my mistake on the picture) fold the edges of the bag over the top, bottom and side of the book. tape it down thoroughly and make sure it's not so tight that you can't close the book.
Ta-da!
Subscribe to:
Comments (Atom)


